
This article will help you setup a basic boilerplate project with Hugo Server, a custom theme and Bootstrap 5 loaded. If you are experienced with Hugo, you can use then build your own structure and site, alternatively, you can use the project to then import ready made bootstrap templates and adapt those pages to Hugo.
Starting & configuring your project with Boostrap and Hugo Server
Please make sure you have gone through Part 1 for background and pre-reqs.
Download the tools
The tools we will use are cross-platform and should work on Windows, MacOS and Linux. You will need the following tools to be downloaded and installed:
- Visual Studio Code OR your favourite code editor for html, css and editing/maintaining the project, vscode is what I will be using throughout the guide
- Hugo static site builder - IMPORTANT: make sure you pick the extended version, Hugo_extended_0.xx.x_…
- Node & NPM - We use this to maintain project depedencies
- Git - This is optional, but highly recommended for version control and remote backups.
- A copy of the sample project used in this article is available on GitHub
We will not cover Git basics in this article, but feel free to read up separately as there are plenty of resources.
At the time of writing this article, I am using Hugo Static Site Generator v0.79.0-1415EFDC/extended and Bootstrap 5 beta. If you get errors or commands look unfamiliar, you can revert to these versions
Initialize project directory
Go to a suitable home/project folder on your computer. Open command prompt/shell to navigate into it:
Hugo needs to be in your environment variables or system path to run, make sure you do that as we will need to run Hugo command very often
hugo new site hugo-bootstrap
This will create a Hugo skeleton site within milliseconds. Too good to be true, but Hugo is fast, really fast. You should see directories: layouts, data, content, archetypes, resources…more on this later.
cd hugo-bootstrap
Now we create a default theme, although this is optional but helps keep the structure clean. Just follow through.
hugo new theme mytheme
This would add a mytheme folder with similar structure as the base folder.
Now that our project folder is ready with Hugo’s structure, we intialize it with NPM to download our dependency, just bootstrap for now.
npm init
This will initalize project directory and ask some questions, give your project name on the first prompt: package name: hugo-website
version: 1.0.0
description: test website for Hugo and Bootstrap
entry point:(index.js) index.html
…continue configuring values or just hit enter to have default values on the prompts. These won’t impact the project, it’s just for prosterity.
npm install bootstrap@next --save
This will install the current version of bootstrap. At the time of this article it was bootstrap 5 beta1. The stable version is 4.x but I wanted latest and greatest and NOT have jquery as a dependency in my project needlessly. You can use 4.x version, but watch out for including jquery as a dependency in later section of this article. Not I am not installing popperjs which is a dependency of bootstrap (and you may see the warning but ignore it) as I will build the the project with bootstrap bundle file, which includes popper.
Optional step:
git init
Skip this step, if you don’t want to create a Git repository. If you do run the command above it will init git repo, this lets you checkout your project as git repository and synchronise your project on Github or a cloud repo provider. Details of that are omitted here to keep the article focused on topic at hand. Feel free to google git tutorials if you want to know more.
Next, open the project the directory in vscode.
Create a .gitignore file in the project root directory and put node_modules and public in it. For the experienced readers, it’s obvious to ignore node_modules directory from synchronising with git repository. Also public is the output folder from Hugo as we will later see and doesn’t need to sync as you can always generate it from source within milliseconds.
Test your static site
Create index.html file so that it’s in your projects layouts directory: hugo-bootstrap/layouts/index.html
Put anything in the content, ex: <h1>Welcome to my first Hugo Website</h1>
Now, to test if the site is working:
hugo server -D --disableFastRender
This launches Hugo development server and you can see your website by opening http://localhost:1313. You will see this on the command window as you type the command above.
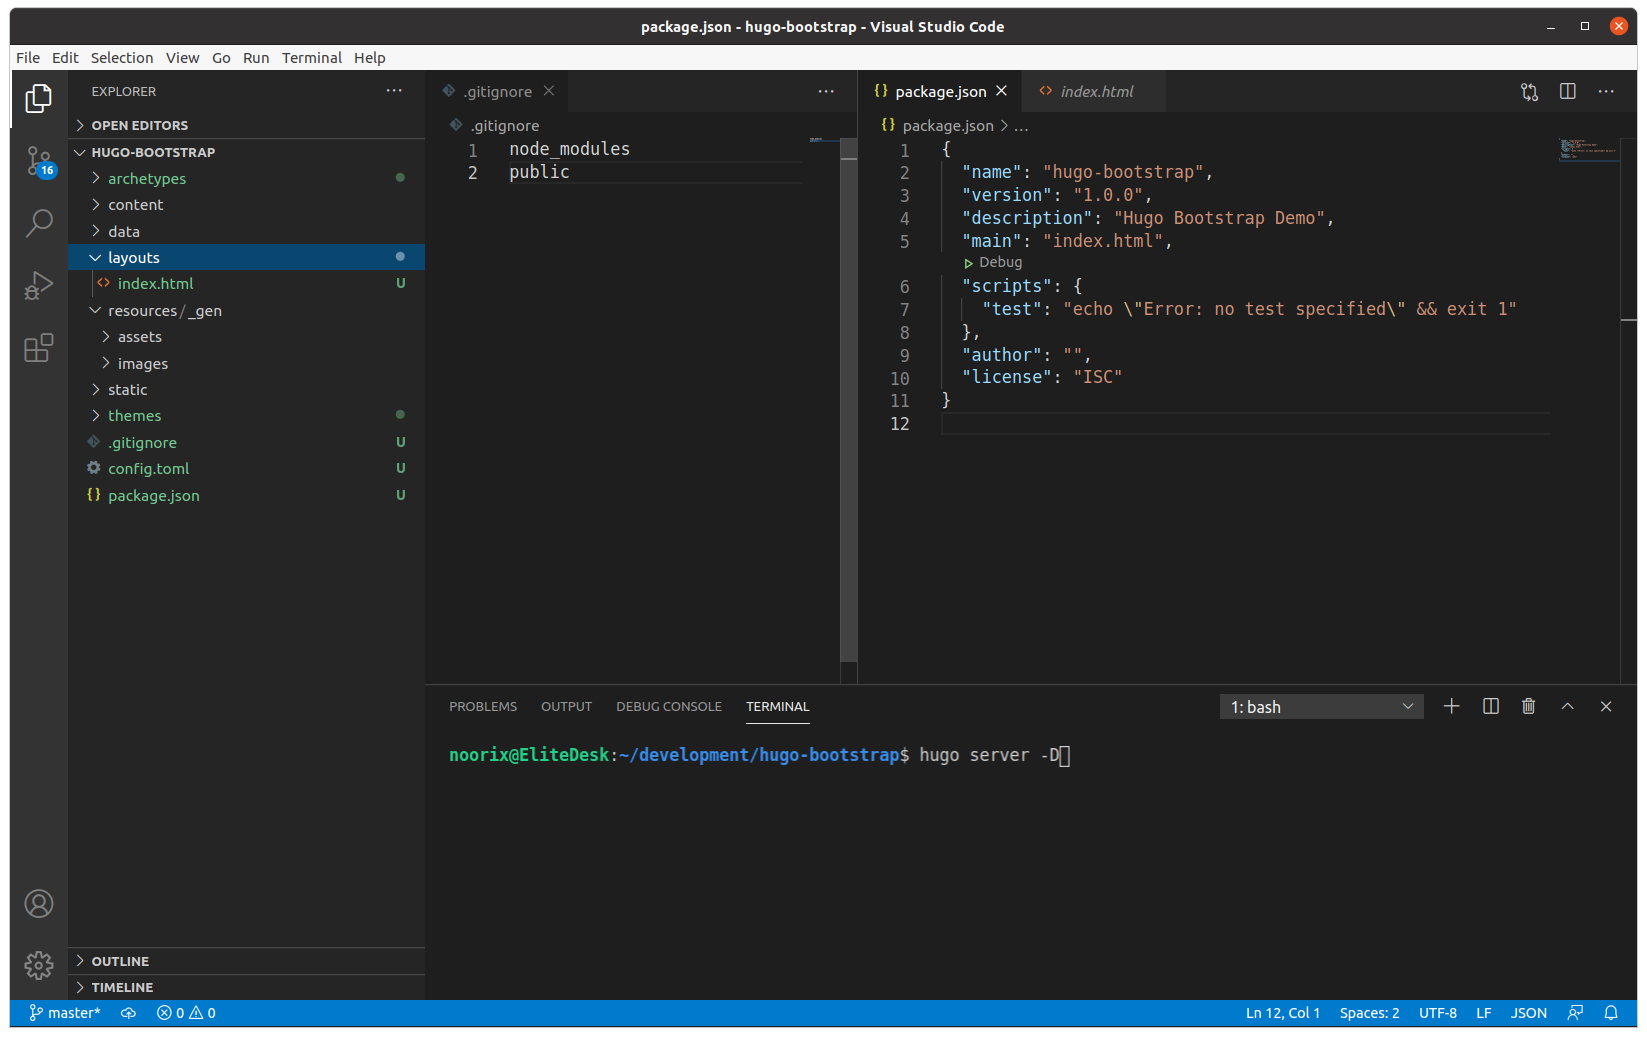
TIP: You can run a command window within vscode, this saves you from going back and forth between two windows and you will be able to see errors within vscode window. See screenshot for reference below:
Open the browser with the link generated by hugo, and you should see a page with Welcome to my first Hugo Website.
Congratulations you have successfully setup a basic Hugo project.
Now let’s bootstrap it!
Add Bootstrap and basic layout
At this point, if you haven’t gone through Hugo’s documentation or video tutorials, I would highly recommend you do so as you need to be comfortable with partials, blocks, layouts, templates, front matter and other Hugo essentials. This is the learning curve I warned earlier, but once you are through, you will really enjoy the power of this tool!
I have covered Hugo basics in the part 3 as we build pages, templates. For now, just keep copy pasting to keep it easier.
Theme Configuration
Edit config.toml file in base directory. Add basic configuration, substitute sample values below with what’s relevant to your site. We will add more configuration in later sections. This is TOML format, so please ensure spacing is correctly provided, two spaces to indent. Alternatively, adapt it to YAML or JSON if you are comfortable with those. See Hugo docs for more information.
  BaseURL = "https://www.mywebsite.com/"
  languageCode = "en-us"
  title = "My Hugo Site"
  theme = "mytheme"
  relativeURLS = true

  [module]
    [[module.mounts]]
      source = "node_modules/bootstrap/dist/js/bootstrap.bundle.min.js"
      target = "assets/js/bootstrap.bundle.min.js"
Note that we have added mounts for bootstrap under node_modules directory, as it helps us grab these on build time easily. It’s also a workaround, as Hugo only looks up it’s assets folder by default. Also, we are using bootstrap.bundle.min.js as it includes popperjs. Also note, we did not drop bootstrap dist files directly and are referencing node_modules. Next time a new release of bootstrap comes along, all you need to do is upgrade with npm and the project will automatically load newer bootstrap.
As we progress, you will see the website will have only 1 CSS file and 1 Javascript file once generated, this is to reduce multiple imports and references and really speeds up your website loading. Great for SEO.
Most of our work next will be inside the themes/mythemes folder
We need to build the basic layout first. Navigate to themes/mythemes/layouts/_default/baseof.html
<!DOCTYPE html>
<html>
    {{- partial "head.html" . -}}
    <body>
        {{- partial "header.html" . -}}
        <div id="content">
        {{- block "main" . }}{{- end }}
        </div>
        {{- partial "footer.html" . -}}
    </body>
</html>
Take a moment to admire the content of this file. Hugo has already created a structure for you with header, body and footer. If you feeling adventurous, modify your layout here, with side bars etc. What this structure is doing is calling partials header and footer and main block which is dynamically replaced with content blocks.
As you are aware, we put meta tags, css includes in head of the page.
Open themes/mytheme/layouts/partials/head.html
<head>
    <title>{{ .Title }}</title>
    <meta charset="utf-8">
    <meta name="description"
        content="Website meta description for google search results go here" />
    <meta name="dc.relation" content="{{ .Site.BaseURL }}" />
    <meta name="viewport" content="width=device-width, initial-scale=1, shrink-to-fit=no">
    <meta name="theme-color" content="#1A94D2" />

    {{ $options := (dict "targetPath" "css/styles.css" "outputStyle" "compressed") }}

    {{ $style := resources.Get "sass/main.scss" | toCSS  $options | minify }}
    <link rel="stylesheet" href="{{ $style.RelPermalink }}" media="screen">

    <!--
        include a favicon for your site if you have it, else omit the line below
        Location of favicon can be in mytheme/static/favicon.ico
    -->
    <link rel='shortcut icon' type='image/x-icon' href='/favicon.ico' />


</head>
We have created a head file that calls for main.scss as the root stylesheet and then builds and minifies it to a single compressed stylesheet. Later will go to main.scss and import bootstrap there. So essentially, we are building bootstrap and our custom stylesheets into a single optimised CSS file.
Amongst other things, you will notice a favicon that you can add or remove that line, and we are also using Hugo variables to build site title and url.
Create these two folders:
themes/mytheme/assets
themes/mytheme/assets/sass
Now create a file main.scss and styles.scss in themes/mytheme/assets/sass
Insert the following in the main.scss
@import "node_modules/bootstrap/scss/bootstrap.scss";
@import "styles.scss";
We have now created a main.scss that imports bootstrap in to the project and an additional custom styles.scss where your custom overrides, theme specific variables can go. At this point, it’s pretty much standard sass and css. You can create as many sub styles within main.scss and import it here.
Optionally, if you are savvy, enough, you can import bootstrap components specifically to further reduce css footprint, instead of a blanket import shown above. Read more on bootstrap sass documentation to learn more.
Open themes/mytheme/layouts/partials/footer.html
<footer class="footer fixed-bottom bg-dark">

    <div class="row footer-text">
      <div class="col-12 col-md text-center text-md-left nav-link text-white">© My Organisation - 2020 All rights reserved.</div>
    </div>

  <!-- JavaScript and dependencies -->

  {{ $bootstrap := resources.Get "js/bootstrap.bundle.min.js" }}
  {{ $js := slice $bootstrap | resources.Concat "js/bundle.js" | resources.Minify }}

  <script src="{{$js.RelPermalink}}" defer></script>
</footer>
Here we have crated a simple footer for our site with bootstrap javascript dependency loaded, minified and ready to go. We don’t need to load popperjs as we have loaded bundle.min.js which includes it. Also since we used Bootstrap 5, we don’t need jquery either. If you use Bootstrap 4 or earlier, you need to add that here.
Open hugo-bootstrap/layouts/index.html
Modify your hello world or welcome to include the main body tags for Hugo.
{{ define "main" }}

<div class="container">
<h2 class="display-4 text-center">Main body goes here</h2>
</div>

{{ end }}
If you used Bootstrap 5.x then Jumbotron is gone, here is a quick custom style you can add to your custom stylesheet
Open themes/mytheme/assets/sass/styles.css
.jumbotron {
    padding: 4rem 2rem;
    margin-bottom: 2rem;
    background-color: var(--bs-light);
    border-radius: .3rem;
}
Open themes/mytheme/layouts/partials/header.html
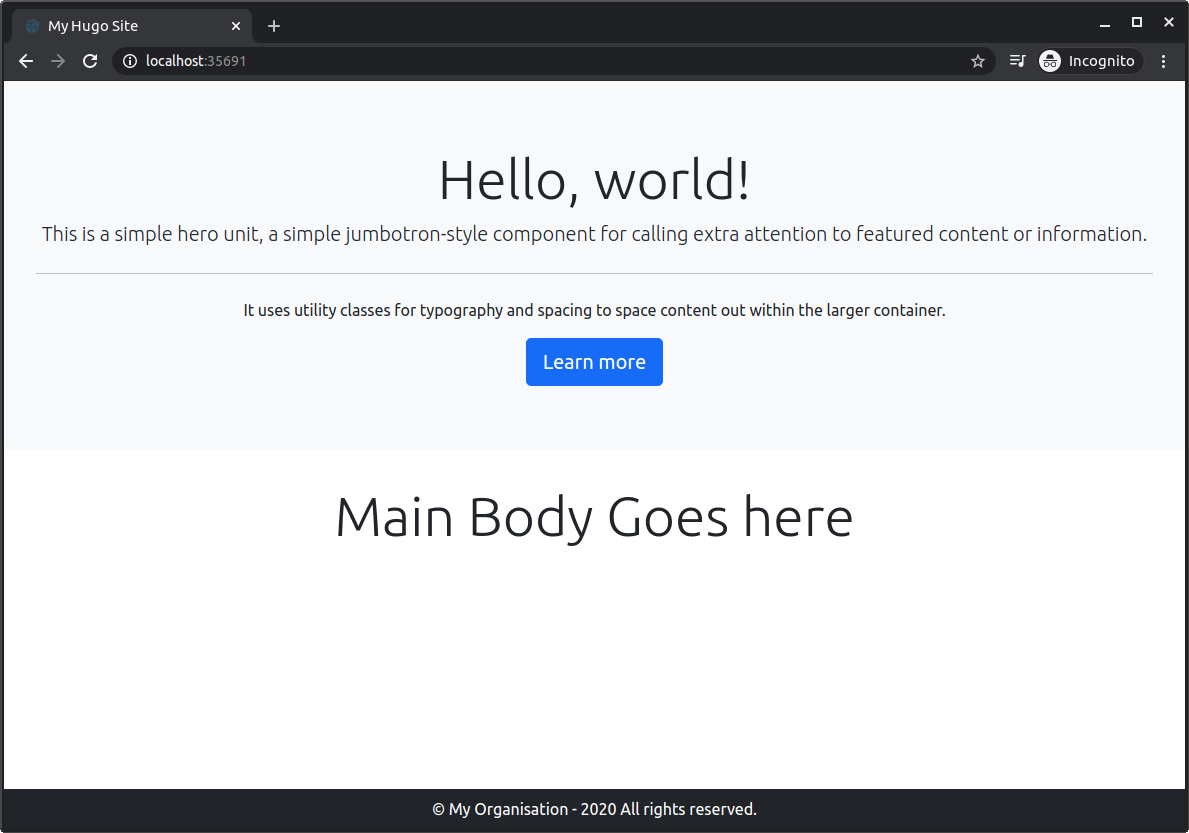
<div class="jumbotron text-center">
  <h1 class="display-4">Hello, world!</h1>
  <p class="lead">This is a simple hero unit, a simple jumbotron-style component for calling extra attention to featured content or information.</p>
  <hr class="my-4">
  <p>It uses utility classes for typography and spacing to space content out within the larger container.</p>
  <a class="btn btn-primary btn-lg" href="#" role="button">Learn more</a>
</div>
Save all files and run your project. You should see a nicely formatted website structure. If you see errors, then go back and see if no typos or copy/paste errors.
Also, restarting Hugo server from command line helps as sometimes it does not refresh completely.
Here is how it looked for me:
If you followed everything successfully so far, you have project ready to start building upon yourself. However, stick with part 3 of this blog and I will show you how to add pages, blogs, taxonomy, top menu, conditional logic within Hugo to build pages associated with menus. Also add google analytics, json/ld schema that can be added dynamically based on page type.
Continue to Part 3