
This article will help you setup a basic boilerplate project with Hugo Server, a custom theme and tailwindcss 3.3.x loaded. If you are experienced with Hugo, you can use then build your own structure and site, alternatively, you can use the project to then import ready made tailwind templates and adapt those pages to Hugo.
Starting & configuring your project with TailwindCSS, AlpineJS and Hugo Server
Please make sure you have gone through Part 1 for background and pre-reqs.
Download the tools
The tools we will use are cross-platform and should work on Windows, MacOS and Linux. You will need the following tools to be downloaded and installed:
- Visual Studio Code OR your favorite code editor for html, css and editing/maintaining the project, vscode is what I will be using throughout the guide
- Hugo static site builder - IMPORTANT: make sure you pick the extended version, Hugo_extended_0.xx.x_…
- Node & NPM - We use this to maintain project dependencies
- Git - This is optional, but highly recommended for version control and remote backups.
- A copy of the sample project used in this article is available on GitHub
We will not cover Git basics in this article, but feel free to read up separately as there are plenty of resources.
At the time of writing this article, I am using Hugo Static Site Generator hugo v0.115.1+extended and TailwindCSS 3.3.3. If you get errors or commands look unfamiliar, you can revert to these versions
Initialize project directory and configure Tailwind and postfix
Go to a suitable home/project folder on your computer. Open command prompt/shell to navigate into it:
Hugo needs to be in your environment variables or system path to run, make sure you do that as we will need to run Hugo command very often
hugo new site hugo-tailwindThis will create a Hugo skeleton site within milliseconds. Too good to be true, but Hugo is fast, really fast. You should see directories: layouts, data, content, archetypes, resources…more on this later.
cd hugo-tailwindNow that our project folder is ready with Hugo’s structure, we initialize it with NPM to download our dependency, just tailwind for now.
npm initThis will initialize project directory and ask some questions, give your project name on the first prompt: package name: hugo-website
version: 1.0.0
description: test website for Hugo and tailwind
entry point:(index.js) index.html
…continue configuring values or just hit enter to have default values on the prompts. These won’t impact the project, it’s just for posterity.
npm install tailwindcss postcss autoprefixer alpinejs
npx tailwindcss init
This will install the current version of dependencies and initialize a tailwind.config.js. At the time of this article it was tailwindcss 3.3.3.
Optional step:
git init
Skip this step, if you don’t want to create a Git repository. If you do run the command above it will init git repo, this lets you checkout your project as git repository and synchronise your project on Github or a cloud repo provider. Details of that are omitted here to keep the article focused on topic at hand. Feel free to google git tutorials if you want to know more.
(Optional: if you initialized git init above) Next, open the project the directory in vscode.
Create a .gitignore file in root directory of the project. For the experienced readers, it’s obvious to ignore node_modules directory from synchronising with git repository. Also public is the output folder from Hugo as we will later see and doesn’t need to sync as you can always generate it from source within milliseconds. The following is the minimum recommended folders you should add for our Hugo project.
node_modules
public
resources
Next steps are compulsory:
Modify the tailwind.config.js to include content from hugo_stats.json (more on this shortly)
{{< highlight javascript >}} /** @type {import(‘tailwindcss’).Config} / module.exports = { content: [ ’./hugo_stats.json’, ’./assets/css/.css’ ],
theme: { extend: {}, }, plugins: [], } {{< /highlight >}}
Create another file in the root of the project postcss.config.js and paste the following. PostCSS purges unused styles, ensuring the final CSS is lightweight and only includes what’s used in the Hugo templates. Autoprefixer ensures the generated CSS works consistently across different browsers by adding necessary vendor prefixes.
{{< highlight javascript >}} let tailwindConfig = process.env.HUGO_FILE_TAILWIND_CONFIG_JS || ’./tailwind.config.js’; const tailwind = require(‘tailwindcss’)(tailwindConfig); const autoprefixer = require(‘autoprefixer’);
module.exports = { // eslint-disable-next-line no-process-env plugins: [tailwind, …(process.env.HUGO_ENVIRONMENT === ‘production’ ? [autoprefixer] : [])], };
{{< /highlight >}}
Create Hugo Config file
Update your `hugo.toml“ file in the main directoy with the following configuration. It adds a lot of good defaults such as creating sitemaps, forcing a hugo version and busting css cache for postcss and more importantly mounting assets directory for easy inclusion of css and js assets. You will see in head and footer templates later.
{{< highlight toml >}} baseURL = ‘https://example.com.au/’ languageCode = ‘en-AU’ title = ‘Awesome Tailwind Hugo Site’
[frontmatter] date = [“date”, “publishDate”, “lastmod”] lastmod = [“lastmod”, “:fileModTime”, “:default”]
[taxonomies] categories = “categories”
[sitemap] changefreq = ‘monthly’ filename = ‘sitemap.xml’
[module] [module.hugoVersion] extended = true min = “0.115.0” [[module.mounts]] source = “node_modules/alpinejs/dist” target = “assets/alpinejs” [[module.mounts]] source = “assets” target = “assets” [[module.mounts]] source = “hugo_stats.json” target = “assets/watching/hugo_stats.json”
[build] writeStats = true [[build.cachebusters]] source = “assets/watching/hugo_stats\.json” target = “styles\.css” [[build.cachebusters]] source = “(postcss|tailwind)\.config\.js” target = “css” [[build.cachebusters]] source = “assets/.\.(js|ts|jsx|tsx)” target = “js” [[build.cachebusters]] source = “assets/.\.(.*)$” target = “$1”
{{< /highlight >}}
Add layout files
Create the following folders
layouts/
layouts/_default
layout/partials
Then create these files
layouts/index.html
{{< highlight html >}}
{{ define “main” }}
{{ end }} {{< / highlight >}}
layouts/_default/baseof.html
{{< highlight html >}}
layout/partials/head.html
{{< highlight html >}}
  {{/* styles */}}
  {{ $options := dict "inlineImports" true }}
  {{ $styles := css.Get "css/styles.css" }}
  {{ $styles = $styles  | css.PostCSS $options }}
  {{ if hugo.IsProduction }}
    {{ $styles = $styles | minify | fingerprint | resources.PostProcess }}
  {{ end }}
<link href="{{ $styles.RelPermalink }}" rel="stylesheet" >The above is the head tag that includes tailwindcss from assets mounted in hugo.toml and when you deploy the website, it minifies the final stylesheet as well.
layout/partials/header.html
{{< highlight html >}}
{{< / highlight >}}
layout/partials/footer.html
{{< highlight html >}}
The boring bit is over. The fun begins, your very first content file
Let’s add a home page, by creating and editing content/_index.html. _index.html is a special file that is considered homepage in hugo and is treated separately to rest of pages. We will add a template for rest of single and list pages later.
{{< highlight html >}}
home page, front matter goes here if needed
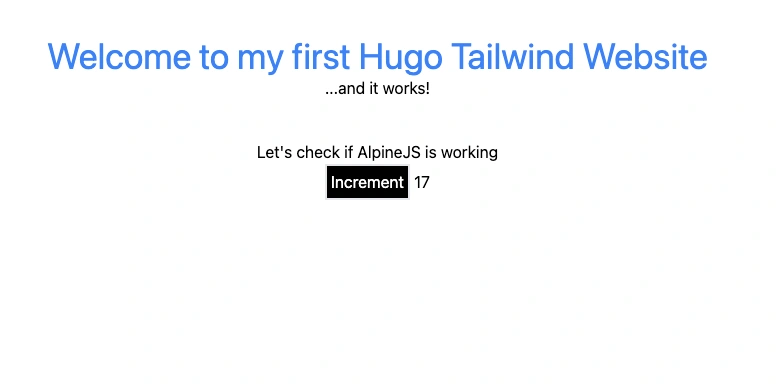
Welcome to my first Hugo Tailwind Website
...and it works!
<div class="my-10" x-data="{ count: 0 }">
    <h2> Let's check if AlpineJS is working</h2>
    <button type="button" class="bg-black border-2 p-1 text-white" x-on:click="count++">Increment</button>

    <span x-text="count"></span>
</div>Next, edit package.json and add the following start script tag. This is not essential but makes it easier to run your project by npm start and not having to remember some of these annoying parameters which I learnt the hard way are almost essential due to tailwind/postcss and hugo caching problems.
{{< highlight json “hl_lines=4” >}} { scripts: { “test”: “echo “Error: no test specified” && exit 1”, “start”: “hugo server —disableFastRender —ignoreCache —noHTTPCache —buildDrafts”, } } {{< / highlight >}}
Now, to test if the site is working:
npm startThis launches Hugo development server and you can see your website by opening http://localhost:1313. You will see this on the command window as you type the command above.
Congratulations you have successfully setup a basic Hugo project with tailwind+alpinejs. The counter should increment and the styling should appear as below if all went well:
If you followed everything successfully so far, you have project ready to start building upon yourself. However, stick with part 3 of this blog and I will show you how to add pages, blogs, taxonomy, top menu, conditional logic within Hugo to build pages associated with menus. Also add google analytics, json/ld schema that can be added dynamically based on page type.
Continue to Part 3