
This article is a continuation of my previous article on building static website with Hugo and Tailwind. We will cover more advanced functionality such as building blogs, pages, menu, structured metadata (JSON/LD) and add google analytics to your site. I will also leave some other pointers for you to explore on your own.
Building content pages, blogs and configure JSON/LD Schemas on Hugo
Please make sure you have gone through Part 1 & Part 2 for background and pre-reqs.
Hugo Templates
Here is a crash course on Hugo templates. There are two types of Hugo page templates:
- List templates
- Single templates
The home page is considered list template, other pages that usually a collection of other pages, such as taxonomy or category pages on a blog are also shown as list templates. Example somesite.com/blogs or somesite.com/blogs/categories/general would be list templates. These are auto-generated urls when you build taxonomy or catagories later.
These template are fundamental in letting you design the page layout, columns, headers or styles and then the main block is where your content can be injected.
We are not using themes in this tutorial, but everything we did can be done using themes. Feel free to read about it on hugo docs.
Hugo lookups your theme/layouts folder first, followed by the basedir/layouts folder. If you put layouts/_defaults/list.html in theme folder, that will be used, but if you put another list.html in the basedir/layouts folder, it will override the theme. So for simplicity’s sake, we will always use the templates in theme/layouts in basedir of the project, except for the home page, which is index.html. You can have this index.html in theme/layouts, but since it’s not style related in most cases has content (not theme), I feel structurally, it needs to be outside theme and inside /layouts
More on layouts and lookup order on Hugo Doc.
Also we learned, that a _index.html overrides the default list.html as the home page. We already have one in our project with sample content using tailwind styles and alpinejs and some sample content. Once again, you can download the project on github
Other files that we used so far was, baseof.html. This is the grandparent file. It’s the first file that Hugo parses for content and builds your site. Ours has the content:
{{< highlight html >}}
{{- partial "head.html" . -}} {{- partial "header.html" . -}}So it calls another type of template called partials. Partials are html files you can include for header and footer like above and are stored in layouts/partials folder. Partials are used for repeatable content across your site, but only within layout files (index.html, single.html, list.html, baseof.html). Say a contact form or banner you want to show on each page. This helps you to modify content in partial it automatically updates on each page fo the site. Partials are awesome and you will definitely want to use them sparingly.
Another useful feature is shortcodes. We will use it in our services page.
Within layouts folder, you can create subfolder and that can override template for a folder. For example, if you create /layouts/blog/single.html, that will only be invoked for pages inside /blogs/ folder and correspondingly URL (ex: mysite.com/blogs/my-first-blog.html). However, pages outside that folder (ex: mysite.com/aboutus.html ) will use /layouts/single.html template.
Update Single Page template
Edit layouts/_default/single.html and replace the content below:
{{< highlight html >}} {{ define “main” }}
{{ end }} {{</ highlight >}}
We are directing Hugo that our page content is wrapped with a container div and to inject our page inside {{ .Content }} placeholder.
Storing static images and files
Static files in Hugo can be stored /static or /static folder (which takes precedence). In my case I use both, /static/images and /static/icons for theme only icons and images. For actual images and content such as blog images, pdfs or downloadables, I use the /static folder as it seems logically correct. Hugo will lookup a static resource such as jpg file or .pdf file first in /static/path-to-file and if not found, in your /static/path-to-file. If neither is found, you will get a 404.
Front matter
Hugo has page meta data in front matter. Which are essentially variables on a page that can invoked inside the content. Such as Date or LastModified, Author etc.
Example front-matter: (We will later use something like this for our blogs)
{{< highlight yaml >}}
title: ”{{ replace .Name ”-” ” ” | title }}” draft: true featuredImage: categories: [“General”, “Technology”, “Products”] keywords: [“hugo”, “static”,“bootstrap”] author: “Murtaza Nooruddin” authorProfile: “https://www.linkedin.com/in/mnooruddin”
{{</ highlight >}}
In example, above these can be dynamically used inside the page or blog to build other content elements or links without hardcoding data. Front matter is extremely important and I suggest you go through the Hugo documentation to learn more.
Archetypes
Archetypes are content templates and commonly used for different page types or directory level templates. Unlike single.html template, which defines the layout, these are inside the main block. Which means they generate sample content of a page when you use the Hugo command to create a page. This is very useful, usually to automate front matter for different page types.
We will build a very basic one for our site, create /archetypes/default.html
{{< highlight yaml >}}
title: ”{{ replace .Name ”-” ” ” | title }}” draft: false
{{ .Name }}
{{</ highlight >}}
Note we have created front matter within the --- headers using YAML. If youo use JSON or TOML the separator and formats are different. See docs on front-matter for more information.
This will tell Hugo to put this content within every html file we create. I have put draft: false, instead of the default true. Keep it true, if you are running Hugo directly on your production server. This setting tells Hugo to build your static site with (true) or without (false) this page.
menu is added as we will use later to construct a nest menu. This is pretty much a basic adaptation of Hugo Docs, but there are other ways of exploring menus, If you prefer you can explore the official method on Hugo docs.
Adding Pages
Now lets add your first page (other than the home page we have already built ofcourse)
hugo new aboutus.htmlThis will add a new page in /content/aboutus.html. Inside the file, you will see front matter already loaded. See how the archetype we created earlier has been applied automatically and processed?
The page title appears as “aboutus”, feel free to change it to “About Us”, so its more readable.
Add 1 in menu code. Add some sample content after the front-matter.
Your file should look like this after the edits:
{{< highlight yaml >}}
title: “Aboutus” draft: false
aboutus
{{</ highlight >}}
Go ahead and test your page at http://localhost:1313/aboutus/
Note the URL is automatically constructed with slug aboutus without the annoying .html extension.
Similarly add another page, feel free to adapt names to your requirements:
hugo new contactus.html
hugo new services/catering.html
hugo new services/hospitality.html
hugo new services/travel.html
hugo new services/conferences.html
Now we have created a nested structure. Hugo will create a content/services folder and create these files within it. As you may have guessed we will have a Services menu item with drop downs.
Build a Nested menu using Hugo Template
Now that we have a bunch of pages, lets build a main menu to navigate accross our pages. Note you can create multiple menus, eg. footer, sidebars.
Edit /layouts/partials/header.html and replace content with code below.
{{< highlight html >}}
<!-- Main Menu -->
<ul :class="{ 'hidden': !open }" class="lg:flex bg-white border border-gray-300 lg:border-none">
    {{ range .Site.Menus.main.ByWeight }}
        {{ if and .HasChildren (not .Parent) }}
            <!-- Dropdown for items with children -->
            <li x-data="{ openDropdown: false }" @mouseover="openDropdown = true" @mouseout="openDropdown = false" class="relative group">
                <button @click="openDropdown = !openDropdown" class="flex justify-between items-center w-full p-4 hover:text-blue-500 lg:hidden">
                    {{ .Name }} <span x-text="openDropdown ? '-' : '+'"></span>
                </button>
                <a href="{{ .URL }}" class="hidden lg:block p-2 px-4 hover:text-blue-500">
                    {{ .Name }}
                </a>
                <div x-show="openDropdown" class="absolute w-full h-px bg-transparent"></div>
                <ul x-show="openDropdown"
                    class="lg:absolute lg:top-full lg:left-0 mt-2 space-y-2 bg-white lg:border lg:border-gray-300 shadow-lg z-10">
                    {{ range .Children }}
                        <li class="px-4 py-2 hover:bg-blue-100"><a href="{{ .URL }}" class="hover:text-blue-500">{{ .Name }}</a></li>
                    {{ end }}
                </ul>
            </li>
        {{ else if not .Parent }}
            <!-- Regular menu item without children -->
            <li>
                <a href="{{ .URL }}" class="block p-4 hover:text-blue-500 lg:p-2 lg:px-4">{{ .Name }}</a>
            </li>
        {{ end }}
    {{ end }}
</ul>
{{</ highlight >}}
The menu itself is added in hugo configuration file below. You can enable sections menu that automatically adds pages in a section. Read more on hugo documentation for menus if you want to go a bit advanced. The weights defines the order of menu appearance. The rest should be self-explanatory
Open hugo.toml and the following to the configuration:
{{< highlight toml >}}
[menu]
[[menu.main]] name = “Home” url = ”/” weight = 10
[[menu.main]] name = “About” url = “/aboutus/” weight = 20
[[menu.main]] name = ‘Services’ url = ‘/services’ weight = 30
[[menu.main]] name = ‘Catering’ url = ‘/services/catering’ parent = ‘Services’ weight = 31
[[menu.main]] name = ‘Conferences’ url = ‘/services/conferences’ parent = ‘Services’ weight = 32
[[menu.main]] name = ‘Hospitality’ url = ‘/services/hospitality’ parent = ‘Services’ weight = 33
[[menu.main]] name = ‘Travel’ url = ‘/services/travel’ weight = 34 parent = ‘Services’
[[menu.main]] name = “Contact Us” url = “/contactus/” weight = 40 {{</ highlight >}}
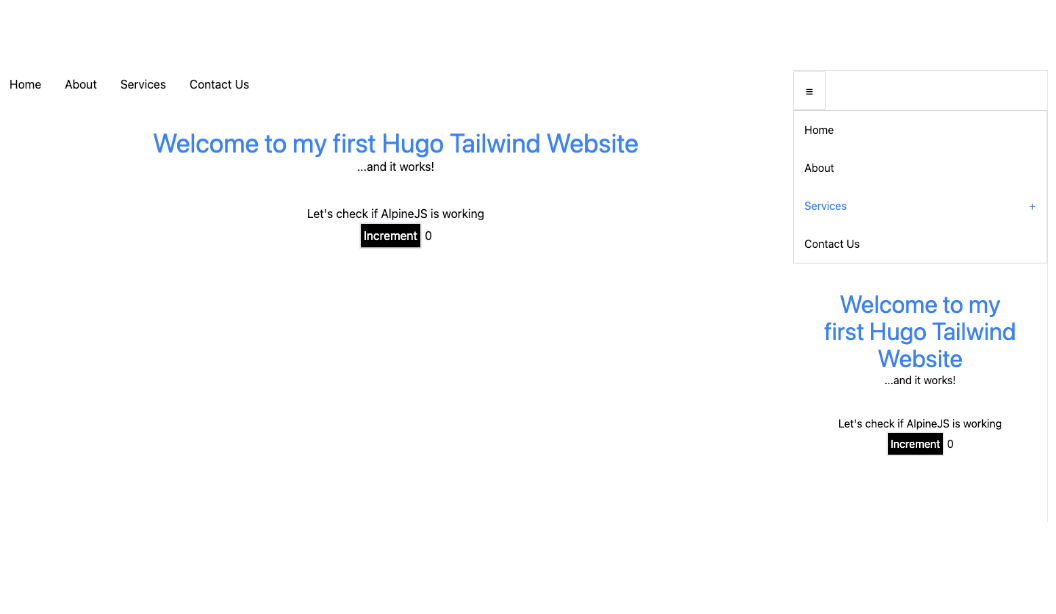
Go ahead and test your site. You should have a working menu structure that loads pages and highlights items based on selected page. If all went well this is what you should see:
A case for Partials
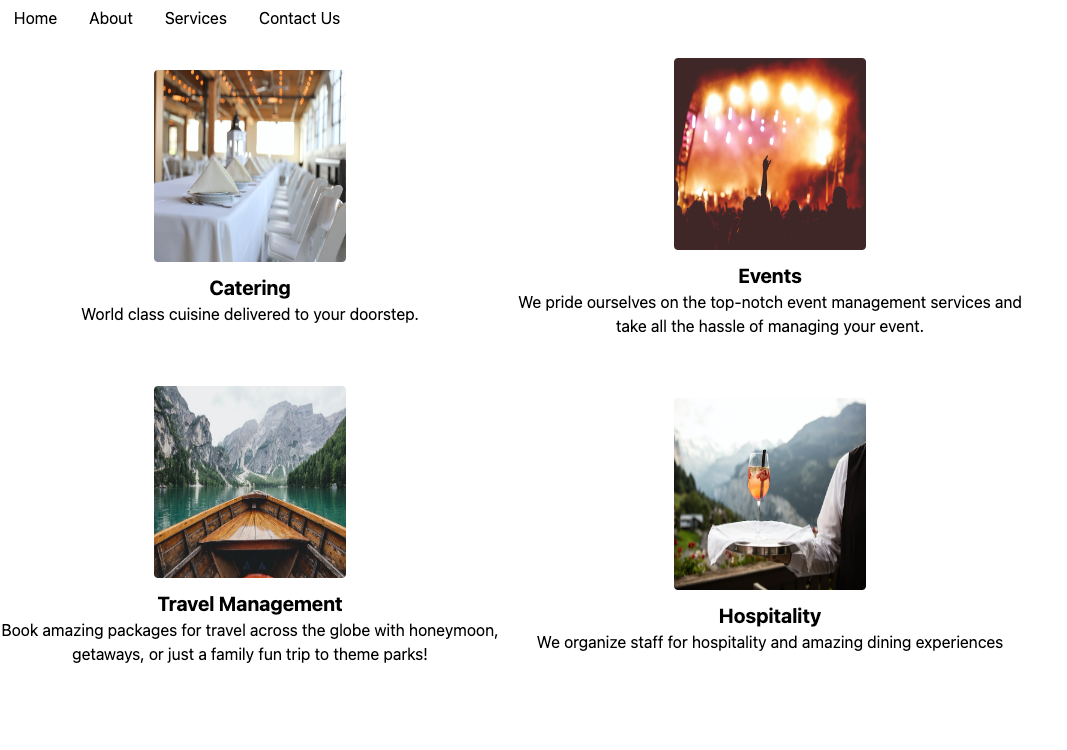
Right now we haven’t linked http://localhost:1313/services page to the menu. But since we have that and it’s page not found issue, lets create some content for it. However, services is not a normal page but a Section (or List template). Furthermore, the list of services then needs to be replicated on home page. This is where Partials or Shortcodes are handy, that let you put repeatable content easily. However, partials can only be used in templates and shortcodes in actual pages or content. In our case, Partials makes sense as both home page and services page are list templates.
Create a file /layouts/partials/services.html. Here is a sample content for you to try out…
** IMPORTANT** : Note the src=“images/sample.jpg”. You don’t have it, but you can use any image file(s) and put it in /static/images folder. Hugo will pickup static image references from your static folder automatically
{{< highlight html >}}

Catering
World class cuisine delivered to your doorstep.
    <div class="space-y-3">
        <div class="flex justify-center">
            <img loading="lazy" class="w-48 h-48 rounded" src="/images/events.jpg" alt="Conferences">
        </div>
        <div class="text-center ">
            <h3 class="text-xl font-bold"> Events</h3>
            <p>We pride ourselves on the top-notch event management services and take all the hassle of managing your event.</p>
        </div>
    </div>

    <div class="space-y-3">
        <div class="flex justify-center">
            <img loading="lazy" class="w-48 h-48 rounded" src="/images/travel.jpg" alt="Travel">
        </div>
        <div class="text-center ">
            <h3 class="text-xl font-bold">Travel Management</h3>
            <p>Book amazing packages for travel across the globe with honeymoon, getaways, or just a family fun trip to theme parks!</p>
        </div>
    </div>

    <div class="space-y-3">
        <div class="flex justify-center">
            <img loading="lazy" class="w-48 h-48 rounded" src="/images/hospitality.jpg" alt="hospitality">
        </div>
        <div class="text-center ">
            <h3 class="text-xl font-bold">Hospitality</h3>
            <p>We organize staff for hospitality and amazing dining experiences</p>
        </div>
    </div>
</div>
{{</ highlight >}}
Next, create a list template in either /layouts/services/list.html or /layouts/services/list.html
Put the following in it:
{{< highlight html >}} {{ define “main” }}
{{ partial "services" . }}{{ end }} {{</ highlight >}}
This should render a services page. Remember this is now in a parital, so this “widget” can be put in template files repeatedly without rewriting or copy/paste.
We also want services to appear on home page, so lets invoke the partial there as well:
If you want this to be in content pages, you will have to save the services in a shortcode instead and then you can use it in _index.html
Open /layouts/index.html
{{< highlight html “hl_lines=5” >}} {{ define “main” }}
{{ partial “services” . }}
{{ end }} {{</ highlight >}}
As you can see both / and /services links of your site have the partial embedded.
Continue to Part 4